Showing posts with label Christmas. Show all posts

Thursday, December 15, 2011

Teacher and Neighbor Gifts

I always like to keep Christmas Gifts as simple as possible.  This year our teacher and neighbor gifts will be the same gift!  A few months ago I was clicking around Pinterest and saw a recipe for Nutella Hot Choclate and was instantly in love.  Yum!!  I have family who live in New Zealand and Nutella is a staple over there, and here at our house.  But as Hot Chocolate?! Can I hear a "hip hip!" This recipe
(although very decadent) is now one of our favorite treats and we can't wait to share it with our neighbors and our children's teachers.


This Gift includes:
  • A cereal or soup bowl-the best price I found on these was at the $ store but only in colors black or green, which are great! I bought mine at Ross in a 4 pack for $7 and Fred Meyer for $2 each
  • A small container of Nutella.  I found these for 3/$7.88 at Sams Club
  • Baggies of Marshmellows (Just stapled shut)
  • 2 Red and white paper straws.  I found mine at a local restaurant supply store.
Tie with a ribbon and attach with tags, one with greeting and the other with THE Recipe.


My 4 year old wanted to make sure I got a picture of the marshmellows (His favorite)


I wanted the tag to have a line so that my kids could write their own names, it is more personal that way, doncha think?  Below are graphics of my tags, feel free to save or print yourself!


This is my favorite type of gift, simple, pretty, and delicious. 

As a parting note my sister, mom and I wanted to come up with a clever line or rhyme, but didn't succeed.  Feel free to laugh or roll your eyes at the ones that didn't work out:

"Forget a cup of cheer, Grab a bowl!  Merry Christmas!"
"We are nuts about you!  Merry Christmas!"
"Your nuts for being our neighbor! Oh wait you didn't have a choice. Merry Christmas!"

Some that we found on the internet were:
"Fall in love? I'd rather fall in chocolate."
"My blood type is Nutella"


Okay maybe they aren't that funny but wait until you are really tired, they get funnier, I promise!

Thanks for the visit!


Monday, December 5, 2011

How to make a cuffed stocking


Yesterday I posted pictures of my stockings and mantel.  Here is the tutorial to make your own piped, cuffed stockings.

First Fabric.  You can get by with just 1/4 yard of each individual fabric, depending on the size of your stocking, however I like to have at least 1/2 yard and use the leftovers for other projects.  1/4 yard for cuff and 1/2 yard of velvet for cuff/piping.
Create a pattern from another stocking and parchment paper leaving a 1/4 in seam allowance or use the cuffed stocking pattern Martha Stewart here.

Cutting out cuff and stocking patterns


Use pattern to cut out two sides of the stockings


Cut contrasting fabric into strips for piping


Fold piping strip in half 


Baste stitch the folded piping in half


Tack/ baste stitch piping to one side of fabric outside edges together.
Cut to go around the the rounded edges of the stocking more smoothly


Pin stocking cut outs right sides together.


 Sew fabric right sides together following around the piping 1/4 in from the inside. It is easiest to use your fingers as a guide


Of course my camera's battery died right here, so I had to finish up this tutorial on a different stocking...
Cut two rectangles of fabric for the cuff and sew sides right side together.
  Sew right side of stocking and wrong side of cuff together. 


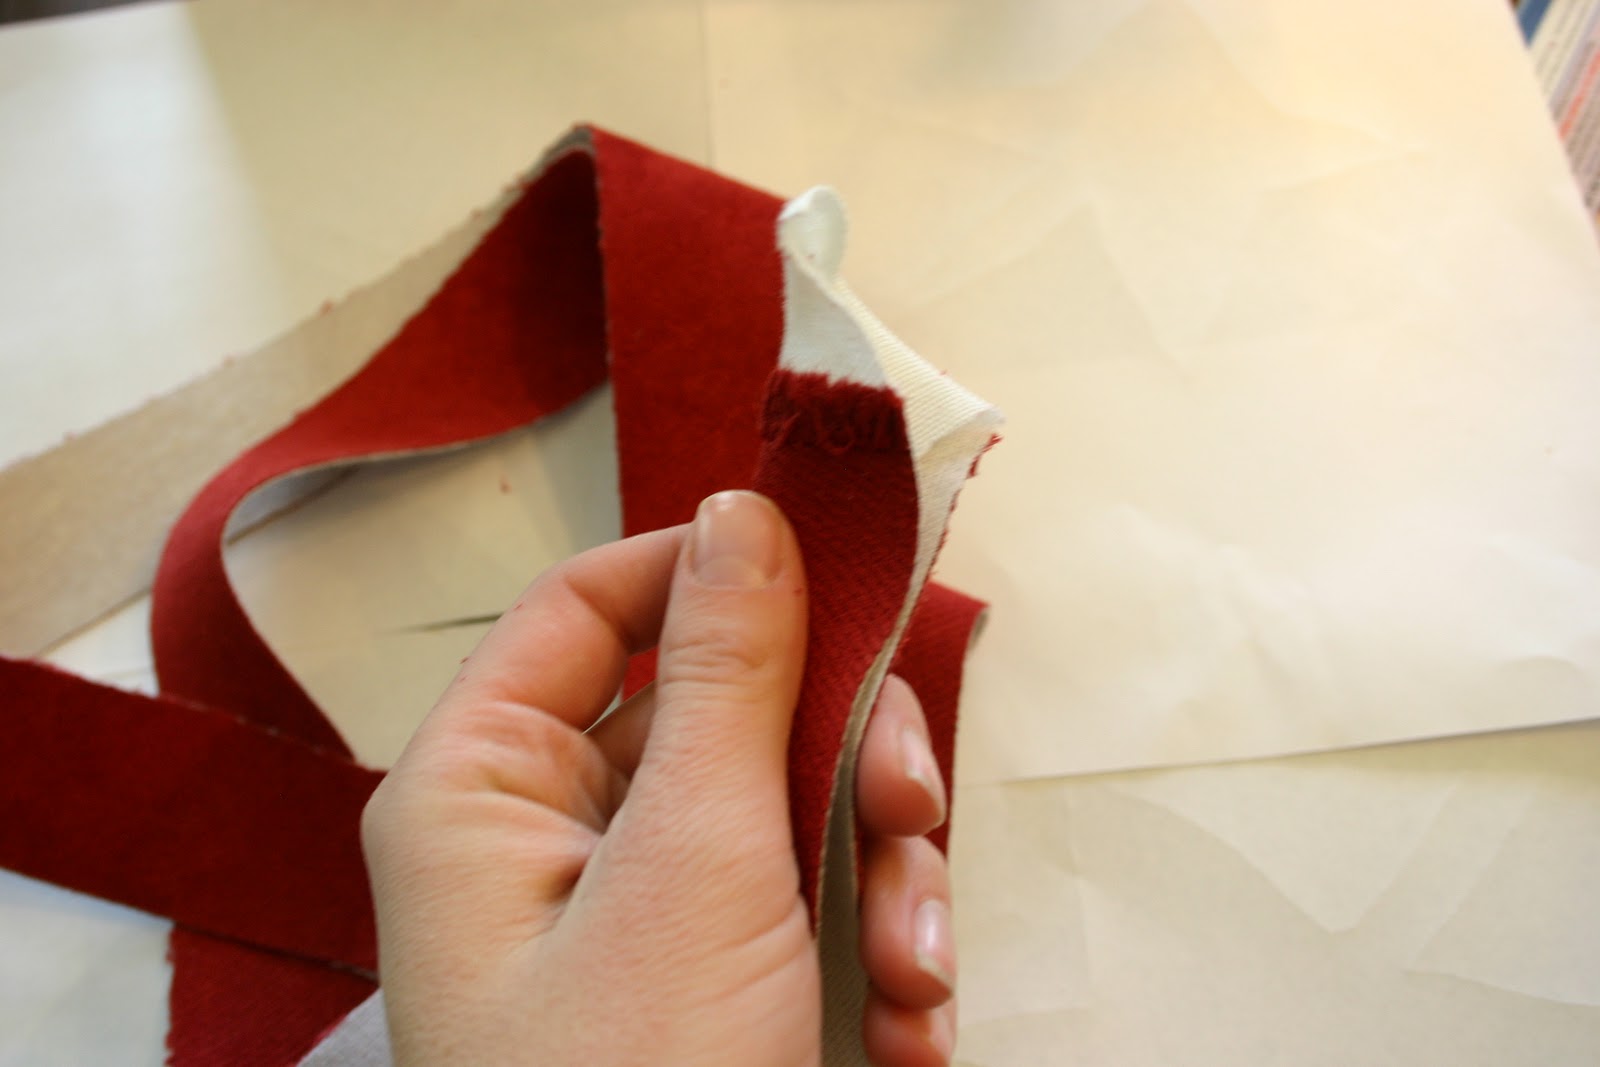
Hide the seam into the top of the stocking.  I used my surger to finish the edge, if you use a suiting/knit fabric like I did that easily unravels you will want to zig zag all of your seams.   


Fold under cuff and tack or use fabric tape


Fold over grosgrain ribbon and sew to inner seam.


Tie abow around the stocking hanger


And Hang all done!!


Now go make your own!  So fun!

Happy Holidays!

Stockings Hung with Care

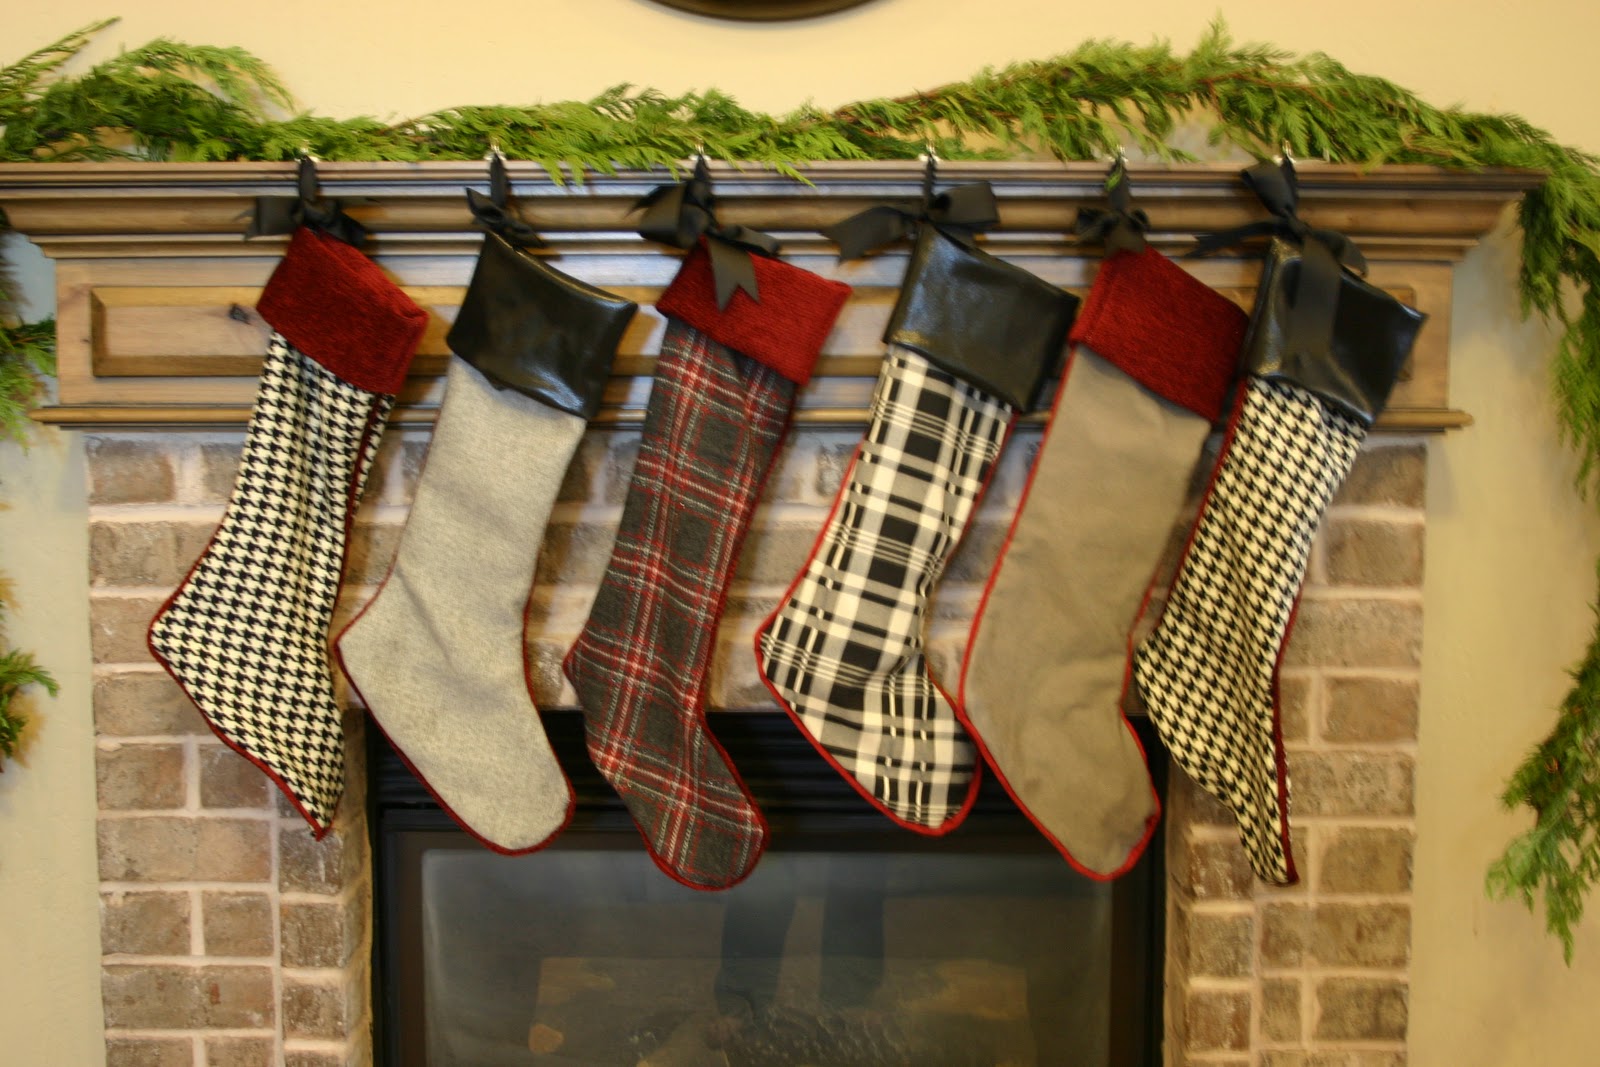
We have had mismatched stockings for years and this year I decided it was time them to match, well sort of!  I started looking for ideas when I stumbled on the Horchow  website and saw these French Laundry Home Stockings at the rock bottom price of $98 a piece, YIKES!


I love the houndstooth and the  plaid.  I love the leather cuff and the red velvet piping.  Be still my beating heart I just had to copycat these!! 


 Brown houndstooth was difficult to find, but Hancock Fabrics had black houndstooth in their suiting section so my color scheme became black, white, gray and red.
I also needed 6 different stockings.  The rest of the fabric I bought as remnants from the Home Fabric store.  The "leather" uppers are good quality vinyl.

And here they are:


It was fun and so easy!    Now if I can just find someone to embroider them for me!  Please do not notice my sewing flaws.  They are not perfect, but that is what I like best about them.  There is just something extra special about doing it yourself!  I will be posting a tutorial on how I made them tomorrow.  Until then! 

Happy Trails!


Linking to:


Thursday, December 1, 2011

Cotton Swab Ornaments

Are you asking yourself, did I read that right?  Cotton Swabs?  Yes, really cotton swabs. 


These ornaments were inspired by some expensive ornaments that I saw at a local decorators store.  The best part is that they are so easy, so inexpensive and lots of fun.  In fact to make these I had help from my 2, 4, and 5 year old.   I will admit they look like a school science project, but they are so cute from a distance  and know one will know you made them from Q tips!   And now for the tutorial...


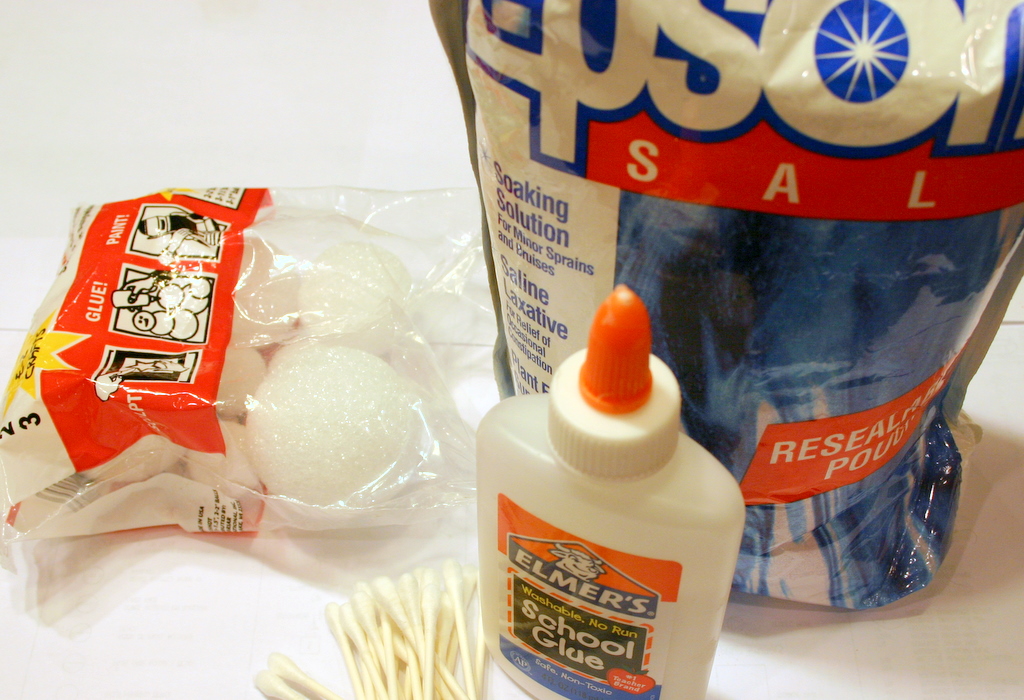
Step 1:  Gather supplies:
  • Cotton Swabs
  • Foam Balls ($ Store)
  • Glue
  • Epsom Salt
  • Ribbon
  • pin
  • Glue Gun

Step 2: Pull cotton ball off of one side of each cotton swab trim edge to a point. Pour glue and salt onto separate plates for easy dipping.
Step 3:  Dip and roll cotton head into glue completely coating

Step 4:  Roll same head in epsom salt

Step 5:  Dip trimmed end into glue as well and then press into foam ball.  The medium sized balls are the easiest to work with.  -- Or use glue gun to secure pointed side into ball


Step 6:  Repeat steps 2-5 for all cotton swabs  pressing into balls on opposite sides and then centering additional swabs in the middle of the others...


Step 7:  Keep adding swabs until the ball is covered  add as many as you like my favorites had about 12- 15.... Let the glue dry...

Step 8:  Cut your ribbon and get a pin


Step 9:  Dip pointed end of pin in glue to hold it in place

Step 10:  Press pin into the top of your creation!  Use a glue gun to reinforce the pin!!  Let the glue dry and hang!


Now go and make one yourself!  You know you want too! Grab the kids to help!  You can also dip in glitter, or spray them with spray paint for another color!!


Thanks for viewing!


A Big Thank You to Dollar Store Crafts for featuring!!