PIY stands for Print It Yourself
Hurray! I am back and I have an awesome tutorial for you!! It is how to print your own fabric!! For the last little while I have been searching and searching for the perfect fabric. The challenge, was that nothing was within my budget. I have no desire to spend hundreds of dollars on the perfect fabric. So instead, I am obsessed with printing my own fabric and checked out every book on the subject from my local library.
There are many ways to print your own fabric, most of which use stamps or making your own stamp using a lino block. But did you know you can also print using stencils? Well, you can and here is how you do it!!
The secret is using "block printing ink." The ink that I used is a
Speedball Block Printing Ink Set 
You can buy block printing ink at most craft stores. I bought mine at Hobby Lobby using a 40% off coupon. I also bought my stencil at Hobby Lobby using a 40% off coupon (different trip.) The price on the stencil was $2.99 before the coupon, the individual inks are $4.19 before coupons. There are other fabric inks that you can buy and if you are doing a large project it is more economical to buy large bottles of ink!
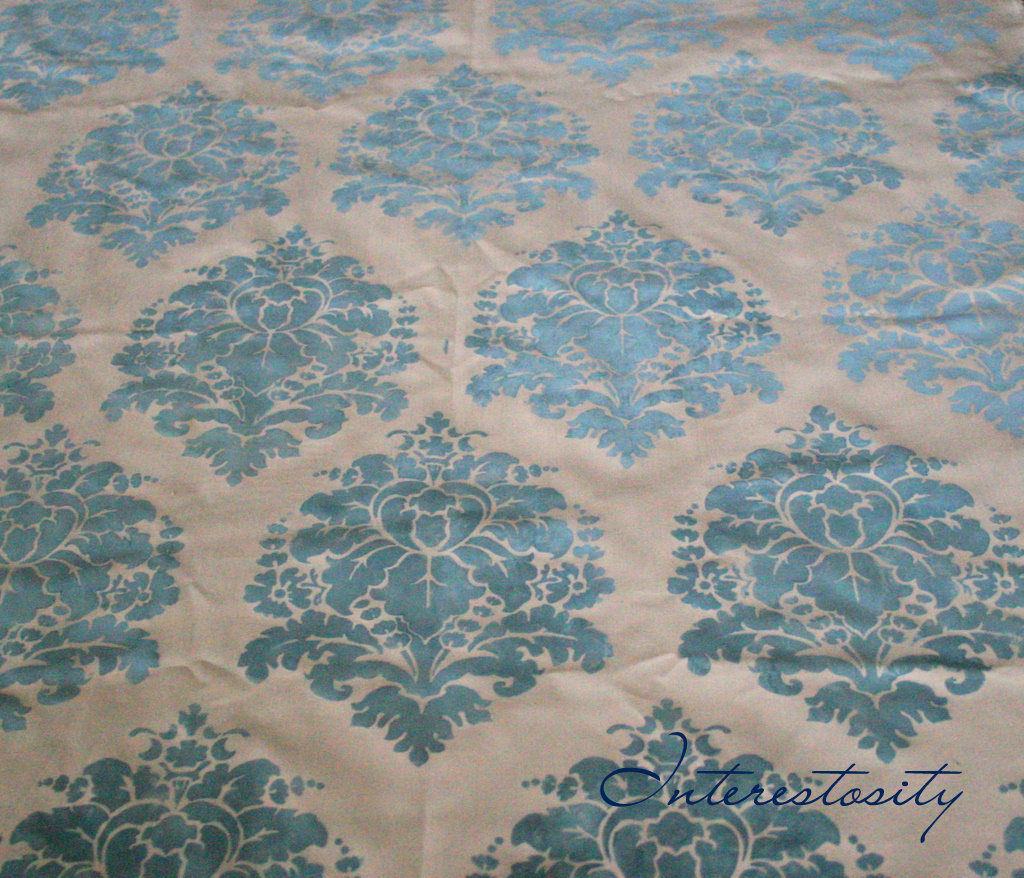
My fabric is a light gray poly/cotton mix(guessing) that I bought from WalMart, at an easy $1.50 a yard. Have you ever looked through WalMart's "Undetermined" fabric? Its kinda fun. I will do a post on that soon too, as it is another great way to save money on your craft projects. So here we go...
How to Print Your Own Fabric:
Supplies:
Fabric
Sponge
Stencil
Block Printing Ink
Iron
Prewash and dry your fabric!! Don't forget this step!! This will help the ink sink into the fabric better.
Mix your block printing ink. I used a combination of white, blue and black to make a light gray blue. I used almost a full tube of white to do just over a yard of 55in fabric. To get the most uniform look try to mix up as much ink in the beginning as possible, because unless you measure or keep track of the exact mix it may be difficult to match your first color. Also the ink WILL dry lighter than your original color mix and some WILL wash out.

- Once mixed, keep your ink covered, I used a small plastic bag to cover, in between ink dips. It dries quickly. Also you can help this by adding TINY amounts of water(and I mean like small drips) . Just be careful not to use too much or your print will wash out or bleed all over your fabric. Another good reason to start with $1.50 a yard fabric--at least until you get the hang of it!
- Tape your stencil onto your fabric or use a stencil adhesive.
- Dab your sponge into the ink and blot it to get most of the ink off of your sponge before applying it to the fabric.

Gently blot the sponge with ink into the fabric. I applied my print by hand, and eyeballed where to put each stencil. You can make your design more uniform by using a grid in disappearing ink before applying your design.
Pick up the stencil and move your stencil to the next spot and apply again. If the stencil overlaps any previous design make sure it is dry before applying.
Apply your design over the entire fabric let it dry to the touch, and then heat set it. Either by putting the fabric in the dryer for 10 to 15 minutes or ironing the opposite side for several minutes. Make sure to use plenty of heat so that the ink does not wash out!
Once the fabric is heat set you can wash it or cut and use for any project. Make sure to use plenty of heat so that the ink does not wash out! To wash use the hand wash setting on your washer. Plan on some color variation depending on how well the ink was mixed.
This is a great way to create your own fabric designs. I like using ink better than fabric paint, or a fabric medium/paint because the texture, once washed, feels just like the original fabric.
Yea! At a $1.50 a yard plus supplies, options are endless!! It is easy, fun and beautiful!!
I made my fabric into some quick and easy pillows...
Cut 2 18.5" x 18.5" squares. Sew fabric right sides together leaving a fist sized whole open, pull the fabric inside out and stuff with filler Use your sewing machine to stitch the opening together and VOILA! So easy and gorgeous!
What do you think? Are you going to try this? I would love to see what you do with your own fabric!
Happy Printing!