Monday, October 1, 2012

My Frames

 
It all started with my desire to create a photo focal point on my wall. I love huge chunky frames so I talked my husband into building --12, yes 12 frames for me, poor guy all with 6 inch trim all the way around. Then I started painting.  I wanted all of them to be pretty neutral but also coordinate with each other and this is how they turned out. 


I had so many compliments that  I convinced my husband to cut more frames. The fall boutiques were coming up so I decided, after gentle pushes from my mom, sister, and SIL, (and with my DH's resigned acceptance) to apply for my favorite boutique - Oh Sweet Sadie. And we got in! That gave us a little over a month to make 50 frames plus a display booth.  I am not sure what I was thinking--it was SO CRAZY!  Between school starting, taking care of home and family and making that many frames was SO stressful.  Plus the thought that I wouldn't sell even one frame was hanging over my head every day as I painted, and repainted, until every frame was just how I wanted it.  What a learning experience!!   I stayed up all night and then got my kids ready for school in the morning and then painted some more. 

Finally it was time for the boutique to begin.  We set up our booth and then from across the room another vendor, Mandy--my first customer--came to us and said that she saw our frames from across the room and wanted to buy at least two of them.  My thoughts were "WOW, Really?"  Especially since the frame she wanted to buy, I had finished only an hour before.  And the rest is history, we have sold more than 40 frames since and are gearing up for the next Oh Sweet Sadie Boutique on November 14th. 
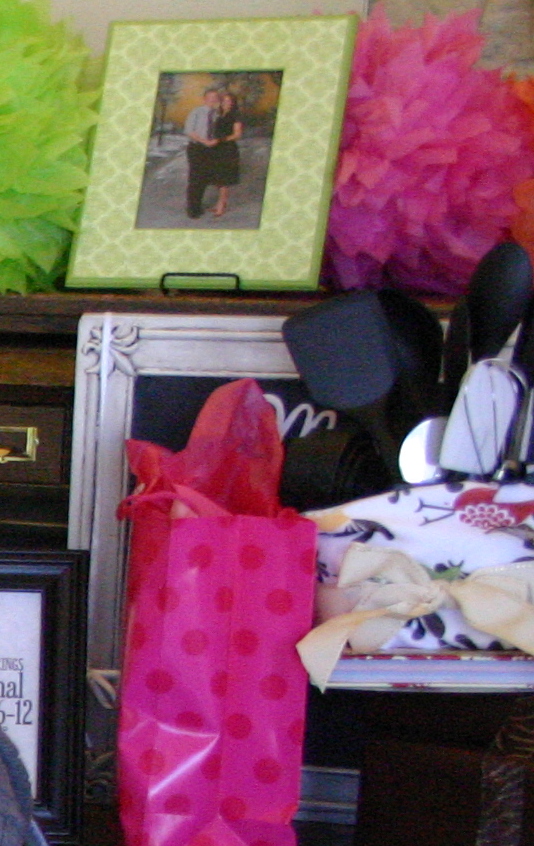
Our Booth:


We also make 18X18 pillow covers in awesome trendy fabrics!  I have always wanted to start my own business doing something I enjoy!  Now I get to paint and shop for fabric, and I couldn't be happier!  I am so glad I took the leap of faith and stress to do it.    Thanks for reading!

Wednesday, July 18, 2012

Sherwin Williams 40% off Sale

Hi friends! 
I have been a very bad blogger these days.  I thought things would slow down with the kids home and summer here, but it seems to be just the opposite.  So this coming weekend is an exciting sale that I wanted to make sure you knew about from July 20-23.  All Sherwin Williams Paints and Stains will be 40% off and all Painting Supplies will be 30% off.  On top of the sales prices you can use this coupon for $10 off a $50 purchase.  This is the BEST deal you will find on Sherwin Williams Paints.  So if you had a project in mind, buy your paint and supplies this weekend.  For some ideas on SW paint colors check out the Sweet Pickens blogSausha has been using a lot of SW paints lately and there are many colors I am tempted to buy myself!

I have some really great projects, that I am finishing up and I can't wait to show you, so stay tuned!


Monday, June 18, 2012

Thrift store find turned Bridal Shower Gift

Yes, this is another chalkboard to add to the world of blogger chalkboards, but hey, isn't it true "There's always room for one more?"  My in-laws were putting together a gift for my nephew's fiance.   Since we are a fairly large group we generally put our money together for a larger gift.  This time we made of gift basket of with a cookbook(Pioneer Woman's latest of course), mixing bowls, measuring cups and spoons, mixing spoons, hot pads, dish towels and a Menu Chalkboard. Below is how I made the chalkboard.


I found this picture at my local thriftstore.  It was faded and some of the trim was coming apart. But otherwise was in good shape.


So I just glued it back in place using gorilla glue


Spray painted the frame-- back and front 2 coats.  When the paint was dry, I taped off the frame and rolled on chalkboard paint


Mix 2/3 glaze, and 1/3 Raw Umber Acrylic Paint


Brush glaze mix to frame.


Wipe off excess leaving glaze in the creases.


The glaze makes all of the details POP!


I painted the word menu onto the chalkboard. You also could just use vinyl.  Then I stapled a ribbon to the back of the frame and tied a piece of chalk to the front, and took a quick shot before taking in into the party--Oops, I left my  ISO too high and it made my picture over exposed.  Ugh!


And here it is at the gift table.  The only other picture I have of it-- from the background of a group photo.


Note to self... procastination is not good for blogging, and two always check your shots before giving it away.

Thanks for visiting!

Monday, June 4, 2012

Marinated 7-Up Chicken

This recipe comes from one of my first encounters with marinated Chicken Breast.  My Mom is a fabulous cook but she never used a grill.  My Aunt and Uncle were the first to introduce us to the fabulous world of marinated-grilled meats and it has been a staple in my life ever since. This recipe is one of my go-to dinners all summer long. Serve with rice or summer salads! Okay so here we are 7-Up Chicken
The ingredients:

  • 3 lbs Chicken -- any kind of cut, breasts are really great this way!
  • 2 c. 7-Up (or Coke, yes the recipe is called 7-Up chicken, I just prefer the color a coke brings to the meat and Coke Chicken doesn't sound as good, but I digress!)
  • 1/2 c. Soy Sauce
  • 1/3 c. Brown Sugar
  • 1 T. horseradish
  • Garlic Salt to taste
You can pound your chicken breast flat here or just clean it up and put it straight into a large ziploc bag.
Da da da!  --That's just chicken in a bag you say? Ummm ya, so...

Mix all remaining ingredients, to look like this:

Pour over bagged chicken:


Marinate 6 hours to overnight.  Overnight is best.  You can also freeze it this way, for a later meal.  If you freeze it just thaw completely in the refridgerator before grilling.

Next remove chicken from bag, and dispose of marinade.  Place chicken breasts on hot grill.  Grill for 7 minutes, turn, and grill for an additional 5 to 7 minutes.  Remove from grill, allow to stand at least 5 minutes before slicing or eating.


Delicious, Simple, Tender, Flavorful.  One of my all time favorite ways to eat chicken breast!
Enjoy!

Saturday, June 2, 2012

Copycat Gymboree Hair Curlies

Hello!  It is been a while since my last post.  I have been having bad luck with my pictures lately, and nothing is quite blog worthy.  I've been playing around with the manual settings on my camera and my pictures have been either too dark or over-exposed-- and of course just as I am finishing up a project the battery in my camera dies or I realize that my CF Card is not in my camera.  Ugh!  And as you all know first hand May is a crazy, busy month, with end of school programs, spring soccer and baseball games finishing up, it feels like I haven't had time to breath.  But enough whining, I SO admire all of you who can balance crazy schedules and blog at the same time!  Blogging is definitely not easy!

On to this week's tutorial... I finished up several pairs of these hair bows the other day and wanted to share them with you!!  One of my favorite stores to shop for my kids is Gymboree, I LOVE their matching accessories!!  I can't always afford to buy them however so I decided to make a few sets of copycat bows myself.   I love how they turned out and they are SO Easy and inexpensive!


Supplies:
  • 2 (or more) spools of 1/4 in Grosgrain Ribbon (also from Joanns)
  • 8 3/8 in Dowels (found mine in a 10-12 pack at Joanns for $1)
  • Clothespins
  • 2 Hair barrettes($ store) or alligator clips
  • Glue gun - or heavy duty craft glue
  • FrayCheck or other Anti-Fray product

Start by spinning your ribbon (from the spool) around the top of a dowel - hold in place using a clothespin.  It should look like this:

Keep wrapping ribbon around your dowel until you reach the bottom.  Use another clothespin to secure the ribbon at the bottom and cut.
Repeat this process 7 more times on other dowels--using two or more different colors.  If using more colors just make sure you have an even amount so that your bows match.  Spritz dowels with water.  Place dowels on a foil lined cookie sheet, and bake in the oven for 20-25 minutes at 225 degrees. 

Once baked the ribbons will stay in a ringlet form.  Remove from dowels and trim ends. 
Cut each length into 4 equal pieces. Apply FrayCheck to ends.

You will need  use 16 pieces for each bow--or 8 of each color.  You will also need a two inch extra piece of ribbon to tie the ribbons together in the center.  Stack the ribbons together and smooth flat in the middle of each ribbon --until all together.  

Use your extra ribbon piece to tie together the centers of all ribbons. It should look like this:

Use your hot glue gun to glue inside of knot to a hair barette, and wrap excess around the barrette. Also secure with hot glue-- and for extra security you could also stitch these end pieces together with a needle and thread.

Repeat this process for second bow, and they are ready to be worn!
And that's it!  Easy Copycat Gymboree Hair Curlies at a fraction of the cost. 

Below are pictures of a couple of other curlies I made.  The color possiblities are endless!!


So fun!  My daughter will be wearing the pink and orange bows to my nephew's -- pink and orange themed wedding!
I love them! Do you?


Linking to:

Monday, May 14, 2012

EZ Baked Tortilla Chips

Chips, Chips and more Chips!  My husband and kids loves them, so we are always running out!  And it is especially frustrating for Mom who can never seem to find enough on sale--and that stay fresh! One way we make up for this is by making our own tortilla chips.  I found this idea somewhere in the blogosphere and will be eternally grateful for a recipe that has saved me time and time again!!   I use these chips for soups, dips, salsa and salads-- and just for snacks. The best part is that they are so much healthier than their fried counter parts!  My kids love to help make these too!!

My ingredients:
  1. Stack of Corn Tortillas
  2. Kosher Salt
  3. Cooking Spray (preferably Canola Oil) -- the Crisco brand is actually my favorite but they all work!
  4. 1/8 Freshly Squeezed Lime (Optional)

  5.  Start buy cutting your stack of tortilla into six equal pieces


    Lay flat on cookie sheet -- try not to overlap pieces.


    Spray tortilla wedges with cooking spray lightly -- making sure each piece is covered!


    Flip each wedge and spray the side facing up with cooking spray!


    Grab a pinch of kosher salt and sprinkle evenly over all your tortilla wedges.  Avoid putting too much!!  A little goes a long way!


    Avoid trying to use your camera while sprinkling--Oops. :)


    Bake in your oven for 8 - 12 minutes at 400 degrees.
    8 minutes for a softer, chewier chip or up to 12 minutes for a crispier chip.


    Remove from the oven and eat immediately -- or let it cool.  Your choice. 
    Sprinkle warm chips lightly with lime juice -- for that touch of lime taste!


    And Enjoy!


I hope you love these as much as we do!  You can also cut these into strips for salad and soup toppings!

Have a spectacular day!!


Linking to:


EZ Baked Tortilla Chips

16 Corn Tortillas
Cooking Spray
1 tsp Kosher Salt
Juice of 1/8 of a lime

Cut tortillas into strips or wedges.  Lay flat on 11in X 17in Pan. Coat one side of wedges with cooking spray.  Flip wedges, Spray opposite side and then sprinkle each wedge lightly with kosher salt.  Bake in the oven at 400 degrees for 8 to 12 minutes. 
Enjoy!!