Showing posts with label Before and After. Show all posts

Tuesday, August 6, 2013

The Settee

I recently reupholstered a small settee/couch for my small sitting room.  I found her at a local thrift store.  She had sat so long in the garage that my husband began threatening to take her back.  So I finally gathered my courage and set to work. 


 Here is the before...

 
The back cushions were shredded--probably by a pet?  I had to replace the back foam because of holes and stains.


I whitewashed the legs and wood trim. I am happy with the result. 
 
It was a great learning experience and hopefully my upholstery skills will keep improving!
Maybe I will take a class...
 
The pillows I whipped up to add a little drama, they are 26x26 pillows.  I found the fabric (both the upholstery and pillows) on the remnant table at Hancock Fabrics.  One of my favorite places to look for scrap fabric.
 
 
Without the pillows....


Thanks for visiting!  I will have some new posts soon.  My camera and computer are finally working again!!


Thursday, April 19, 2012

Romantic Girl's Dresser


I finally finished my daughters dresser today!  I found her on my local classifieds for an easy $20. 
I had looked for months for the perfect dresser for her room and was looking at a new one--crazy I know, but I was desperate.  Until 9:00 one night I was browsing the classifieds when  I saw an ad for a $20 dresser.  I immediately sent a text the seller to make sure I read the price right.  She said that it was not a mistake.  I immediately called her and set up an appointment for next day and I could not have been happier with my final purchase.  Sometimes you just have to be patient...

Well, she was in great shape, with cute lines and gorgeous feet.  But just not what I wanted for my little princess.  Here is her before picture:


I cleaned, and sanded her then applied several coats of Rustoleum Heirloom White spray paint, sanding between coats.  Then debated what finish to apply to the drawers.  Last week I made these bars and used a cellophane bag to wrap up my treats as gifts.  I was admiring the pattern on the bag when I realized it was just what I was looking for.  I slapped it down on my $5 projector (a thrift store find) and it looked perfect.  How's that for an easy transfer!
If you don't have a projector you can always check one out from your local library.


I used the projector to place the image on the drawer, and traced the image onto my drawers and then moved the drawer to finish off the pattern.


Next I took my fine point paint brush and a bottle of acrylic paint and filled in my pencil marks.  Moving from top to bottom to avoid touching any wet paint.  This was a slow process, but well worth it!


I let the drawers dry, and cleaned off any extra pencil marks, sanded, and distressed some of the edges.  Then applied 3 coats of Polycrylic. 

Installed her knobs, and she was finally finished!! Hallelujah!

Now for some beauty shots:


  Do you like her?  I do and most importantly my three year old princess does too! She told me I was the best mommy ever!  Gotta love that -- especially since her dresser is not her favorite color-pink.  And everything she loves is PINK!

Thanks for the visit!

A Huge Thank You to Lindsey at Better After for Featuring!


Linking to:
 

Thursday, February 9, 2012

My Slipcovered Sofa

BBB (Back before blogging)  I had these two couches, which my husband and I purchase when we were first married.  They actually don't look to bad in this picture.  But in person they were a mess.  With spots and stains (from my beautiful children) and faded yellow spots from sun damage, they needed lots of help.  My husband just wanted to replace them. But aside from the cosmetic damage and the dark green color they are in really great condition, just needing a face lift.  My goal?  To slipcover them. 


 I started with Miss Mustard Seed's slipcover tutorials, then moved on to free Youtube videos, and figured out how to make them piece by piece. There are also slipcover tutorials that you can purchase, that I am sure save you a lot of time, and I was wishing I had bought one...but it is possible to do it without.  I will warn you that making your own slipcovers takes HOURS and HOURS!!  One night (because I have 4 kids to take care of) I stayed up the entire night just to get ahead and to work on them without interruption.  But now they are finished and as imperfect as they are I still love them!  

The best part is that I can throw them in the washer and they look like new again!

The worst part?  They were so close fitting, they can be difficult to take on and off!
I really struggled with the zippers--being an intermediate to beginning sewer this was the most difficult part for me!  Also the skirt was challenging.  But that is because I had to guess how to sew and fit them myself.
 I used close to 30 yards of fabric at $5.99/yard for both the sofa and loveseat. 

And here is my loveseat again all finished.  The damask pillows I printed and made myself, you can read that tutorial here


Thanks for the visit!  This project was time consuming but SO worth it!  And yes, I would do it again, just not right away.  ;)

Thanks for the visit!


Tuesday, January 17, 2012

Bookcase Beauty


She started out plain and boring.  A heavy wood bookcase without personality and now she is painted and pretty.    Here is her embarassing before picture, poor girl.


With scratches and dents, she was in a sad state.  Her one benefit was that she was solid wood inside and out and that she was $15 from my local thrift store. 


I started first by sanding out the major dings and dents with my trusty orbital sander. 


Next she was primed and painted... with help (or not) from my 2 year old.


My husband attached new feet to give her a more finished look.   


Next I stenciled the back piece using a Martha Stewart Stencil from Michaels.  
I learned one lesson -- start on one side and move to the other side.  Do not go around the edges and try to meet in the middle or else you will make the same mistake that I did.  Good thing the worst part is in a place where no one will notice. 


Now for the distressing, I took a razor blade and started scraping the paint off the edges, and then glazed her. 

Next she was sealed with 3 coats of Polycrylic in a semi-gloss.  And here she is again!


I love her feet!


Here is how she looks in my house. I wish I knew how to stage...


And most importantly shelves and books within 2 year old reach!


 What do you think?  My paint color is Martha Stewart Living Paint in Popcorn (at $5 a quart), and glazed using Martha Stewart Black Coffee Glaze.


Linking to:

Tuesday, December 20, 2011

Buffet Update

A while back I posed the question of whether or not to glaze a buffet.  I decided to try to glaze and when that didn't work--then to dark wax it and it did not turn out well.


The finish on the doors was not perfectly smooth, so it just brought out all of my sanding marks, and brush strokes.  It looked scratched and dirty.  So I cleaned it and repainted, again.  She'll just have to stay white.  And in the end she really is gorgeous and I love her just the way she is!


Thank you for all of your advice and wisdom!  Next time I promise I'll clean my garage our before I take a picture.  Yikes!


Wednesday, November 30, 2011

To glaze or not to glaze

I am winding down to the finish line and it has taken me forever to finish her, but as of right now she is finished unless ... you disagree!  Here she is today... 


Here is her before shot:

And here is her challenge spot:


The detailed grooves.  I got this great idea that I would fill in the grooves, sand it down smooth and then just paint.  An easy three step process right?  Wrong!!!  My first product was regular ol' wood filler.  And it didn't work.  The grooves were too deep, the filler wouldn't smooth.  Next was an expensive wood filler, that too didn't work and took almost a week just to dry and then it wouldn't sand smooth.  I needed a break, I worked on several other projects and finally got the courage to work on it again.

Next I got the recommendation from a Lowes paint person to try using regular old paintable caulk.  Ahh!!  That was a disaster.... caulk is not sandable, so any bumps I missed along the way just wouldn't go away without a razor blade, and caulk remover does not work!  So finally I took some plain old sheet rock mud an smoothed it over the top of everything let it dry, sanded and my sanity finally returned. 

  Time to finish painting, and here she is again all gussied up and distressed ala razor blade. 


Now for the final question.  Does she need a glaze?  I have been debating with myself whether or not to do it.  I don't always love the dirty look of a glaze, but it might help her details a little and cover a few mistakes.  What do you think?  O blog-o-furniture-godesses, I need your wisdom! 

Thanks in advance!


Linking to:  Primitive & Proper

Saturday, November 5, 2011

Buffet Makeover


I bought this buffet at a thrift store several months ago, and as I said before she had been badly mistreated,  I couldn't rub my hand across her top without getting a splinter.  The finish was completely gone.


I can just picture some resentful teenager gouging a pocket knife into the top of this antique buffet.  Poor girl.

 My first work on her to try to fill all the holes and gaps on the top. 
I bought some old fashioned milk paint for the first time, mixed it up and started too paint.  I chose tavern green and it was not pretty -- not the look I was going for anyway.... So I added some Light Cream and mixed, much better.

After going through 4 bags of milk paint (not cheap!) just to cover everything I started sanding to distress and the paint would chip off in the strangest ways. 


I hated it, the top especially, in some places the veneer was split and would bulge. 
Time for a change, I wanted more wood showing so I took a hammer and chisel and removed the top layer of cracked veneer.  This was not a pretty process and some place stuck more than others.


 I ended up with gouges that I had to sand with my sander in order to smooth.


 Next I applied the stain, I am digging the rough, gouged look.  Anything is better than the smiley faces or bulges, right?

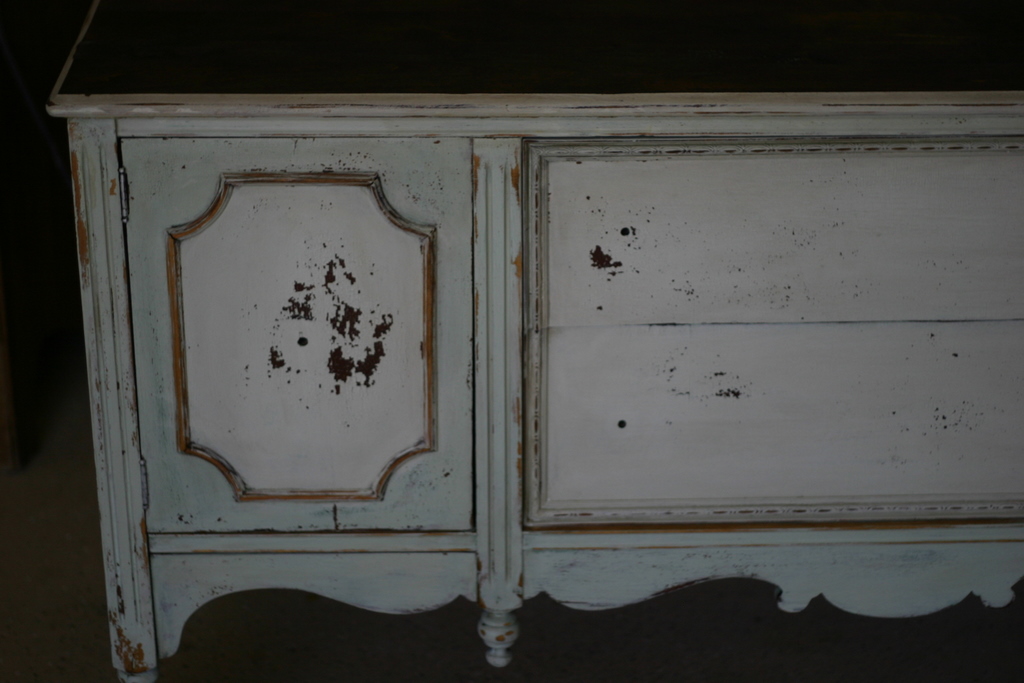
 Next problem was the dirty look of the my milk paint job. It was just irritating me  I loved the chipped drawers, but the paint kept chipping off the cupboard doors and it wasn't pretty. 

My husband's friend came to our house and saw it in the garage and said, "Man they really messed up on that paint job."  Not knowing I had painted it this way on purpose.  My husband was kind enough to let him know that I had painted it.  Poor guy.   But he was right, it had been bugging me for weeks.  The green was too minty and the finish just looked dirty and the chipped paint was not in the right places.


Why am I telling you all of this?  One reason...there is absolutely no reason why you shouldn't try something new.  Whether its refinishing furniture for the first or 500th time, or even trying a new product.  99% of the time with a little elbow grease you can change it or fix it.  And yes, I will try milk paint again.

On to her new look, after she was sanded. I mixed up a white wash using some light blue oops paint and applied several coats letting each one dry in between and sanding.  Following the step by step here. Too periwinkle, I mixed up a cream color paint (semi gloss) and water and white washed again.  And here she is making her debut all dressed up and purdy.


So much better!  It makes me sick to think about the waste of time and money.   But as my mom loves to tell me, "Can you really put a price on education?"  So true, some of us have to learn the hard way.  Guess I am one of those. ;)


Linking to: